Issuing a work order sends a Draft to your vendor and starts the job. Until you issue it, the work order is only visible to your team and nothing happens on site.
Creating vs. issuing:
- Creating a work order is filling in the details: title, location, asset, procedure and so on. See How to Create a Work Order.
- Issuing is the step that sends it to the vendor. That’s what this article covers.
Before you issue
Make sure the work order is in Draft and has:
- Assignee: the vendor who will do the job
- Amount: the cost of the job. You can type it in, or request a quote first.
Issue a work order
Step 1. Open the Draft work order. If you’ve just filled in the New Work Order form, you’re already on it.
Step 2. Check the details, especially the Assignee and Amount
Step 3. Tap Issue WO
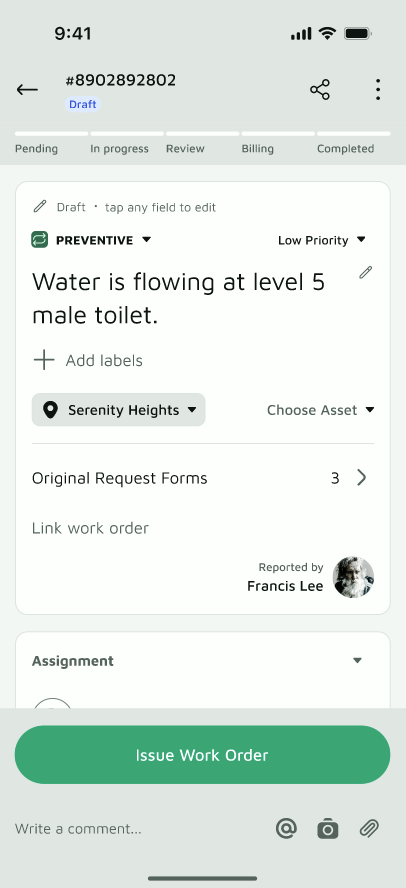
Step 4. The work order moves out of Draft:
- Under your approval threshold: it becomes Pending | Issued, and the vendor is notified.
- Above the threshold: it becomes Pending | Awaiting Sign-Off. Your Approvers must authorize it first, and then it’s sent to the vendor.
What happens next
- The vendor manager receives the work order and dispatches a technician (Pending | Enroute).
- When the technician arrives and starts, the status becomes In Progress.
For the full journey, see Work Order Status and Sub-Status.
Good to know
- Issuing is final for the amount. Once issued, the amount is locked. Check it before you tap Issue WO.
- Quoted work orders issue automatically. If you requested a quote, accepting it issues the work order for you, so you don’t need Issue WO.
- Not ready yet? Leave it in Draft. A Draft isn’t sent to the vendor, so you can keep editing.
- Rejected by an Approver? The work order returns to Draft | Need Revision. Update it, then issue it again.
