Getting these foundational steps right ensures your Basementgrid environment is ready for action.

Step 1: Create Your Workspace
Your Workspace is the central hub for all your properties and operations in Basementgrid. This is where everything begins.

How to do it:
- After signing up, you'll be prompted to + Create New Workspace.
- Next, you'll need to complete your workspace profile
-
Enter your desired Workspace Name (e.g., "Maplewood Management," "Downtown Property Group").
- Enter MCST / UEN
- Enter Address
-
- Click Save & Continue.
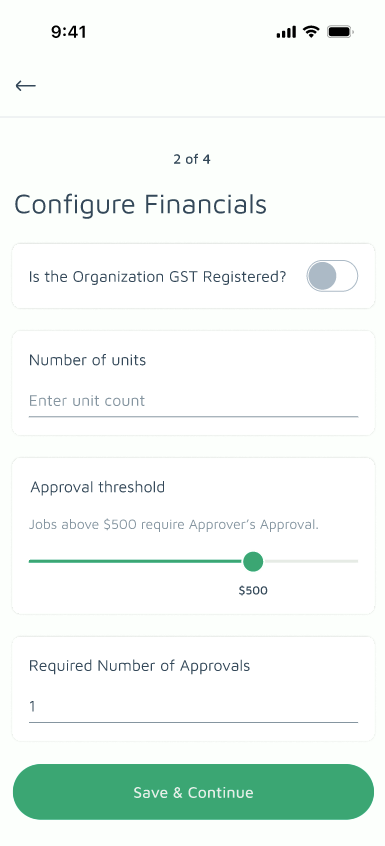
Step 2: Configure Financials
Your Financials setup determines the approval rules for work orders in Basementgrid. Here, you'll define the dollar threshold above which a work order requires approval, and how many approvals are needed before it can proceed. Getting this right from day one keeps spending in check without slowing down day-to-day operations.
How to do it:
-
Select if the organization is GST registered
-
Enter number of units
-
Set the Approval Threshold Amount
- Enter the required number of approvals
- Tap Save & Continue
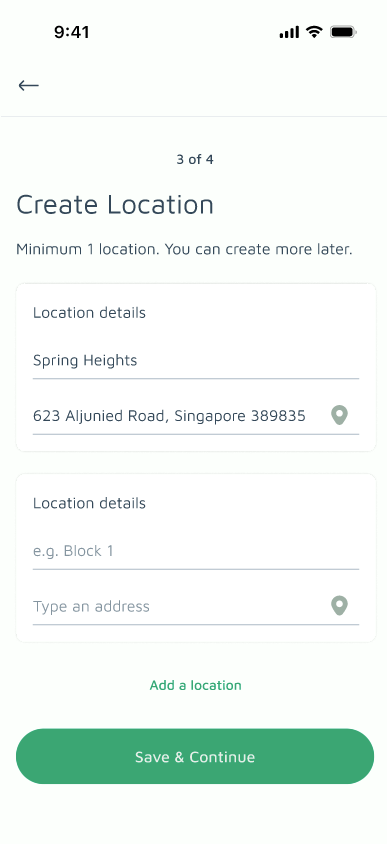
Step 3: Create Location
A Location tells Basementgrid where a work order applies. At least one location is required before you can proceed.
How to do it:
-
A default location will be autofilled using the Estate Name and Estate Address you entered in Step 1. Check that it's correct and edit it if needed.
-
If you want to add more locations (e.g., specific blocks, common areas, or facilities), tap Add a Location and enter the details.
- If not, simply tap Save & Continue.
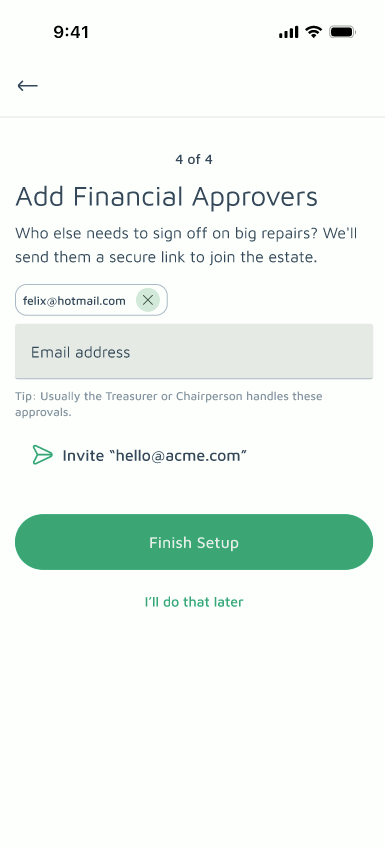
Step 4: Invite Financial Approvers
In Step 2, you set the dollar threshold above which a work order requires approval. Now it's time to invite the people responsible for approving those work orders.
How to do it:
- Enter the email address of the person you'd like to add as an approver.
- Tap Invite "email address you typed".
- Repeat for each additional approver you want to add.
- Once all approvers have been invited, tap Finish Setup.
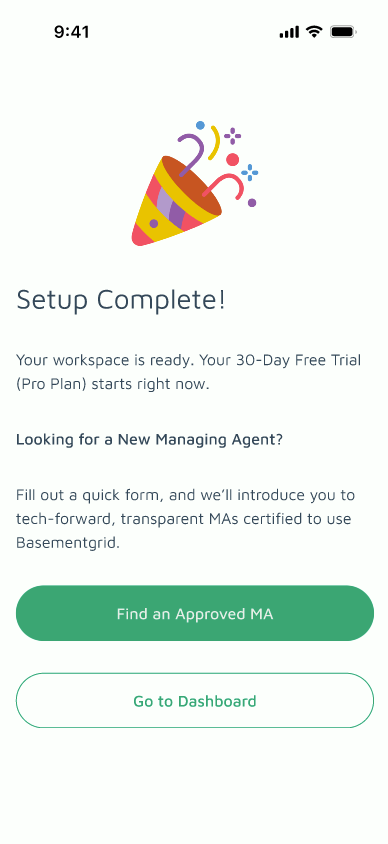
Voila, your workspace is set up! You can now tap Go to Dashboard to get started.
If you're looking to bring in a Managing Agent, you can tap Find an Approved MA instead. Fill up the short form and we'll have one of our partner MAs reach out to you directly. Rest assured, all contact details submitted are kept confidential.
What's Next?
With your workspace created and your team invited, you've established the foundation! Your next step is to populate your workspace with the specifics of your properties.
Proceed to the next article: Adding Your Locations and Assets to fully prepare your Basementgrid for managing work orders.