Once a Building Manager has accepted your completed work, the work order moves into Completed | Pending Invoice. At this point, the Vendor Manager needs to submit the invoice before payment can be released.
Step-by-Step: Submitting Your Invoice
Step 1: Find the Required Action Card
Open your vendor dashboard and look for the job under your Required Action card — it'll be flagged as awaiting invoice.
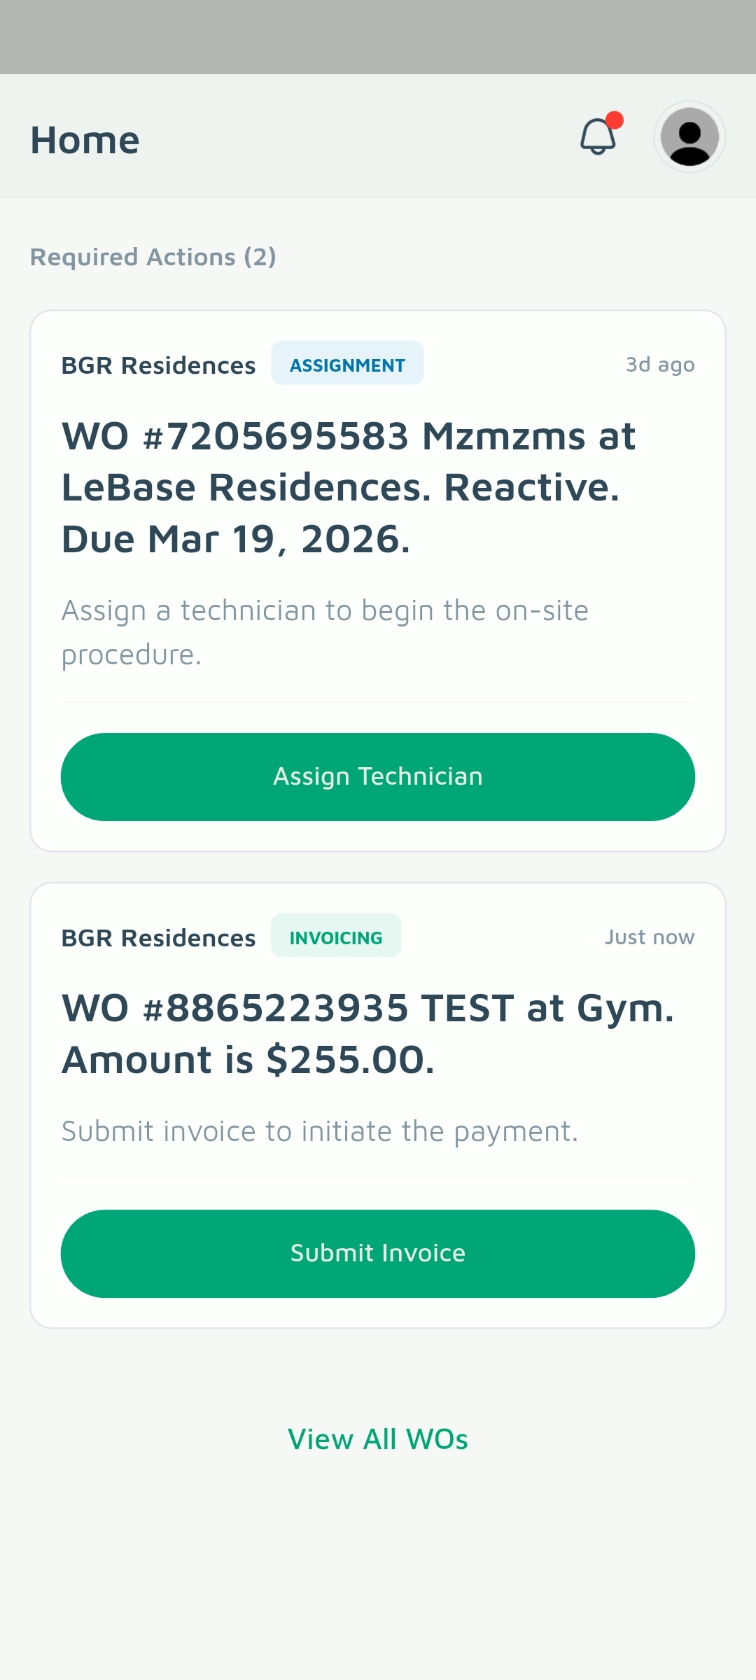
Step 2: Tap "Submit Invoice"
This opens the invoice submission form for that specific work order.
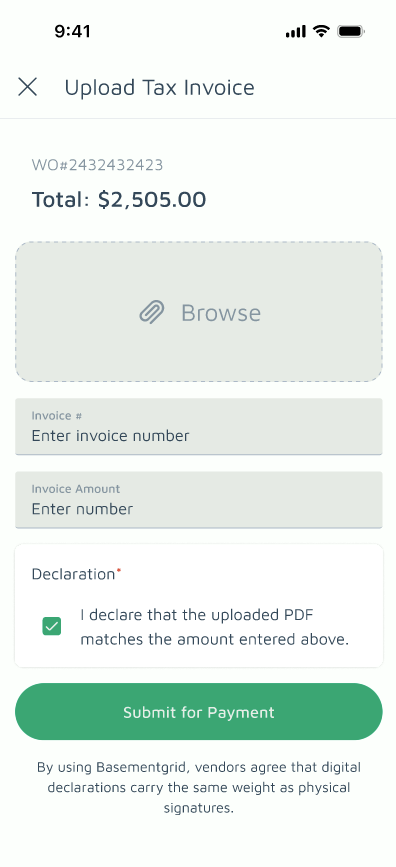
Step 3: Upload Your Invoice and Enter the Invoice Details
- Upload file: Attach a clear copy of your invoice (PDF or image).
- Invoice #: Enter the exact invoice number as it appears on the document — this is what council members and accountants will match against your records during payment processing.
- Invoice Amount: Enter the total amount stated on the invoice. This should match the agreed cost for the work order to avoid delays during approval.
- Declaration checkbox: Confirm that the invoice reflects the work completed and the agreed amount.
Step 4: Tap "Confirm"
Your invoice is submitted, and the work order status updates to Completed | Awaiting Payment, pending release of funds by council members.
What Happens Next
- If approved: The work order moves to Completed | Paid once council processes payment, and the job is officially closed.
- If rejected: If the Council Approver flags an issue with the invoice — such as an incorrect amount or missing details — the work order moves to Completed | Invoice Flagged. You'll need to correct the details and re-upload before it can proceed.
Tip: Double-check your invoice number and amount before confirming — mismatches are the most common reason invoices get flagged and sent back, which delays payment.
