Once a request or maintenance fault is logged as a Work Order, the next step is routing it to the right boots on the ground.
In Basementgrid v2.0, jobs can be assigned directly to your internal staff or dispatched seamlessly to third-party contractor networks.
Step-by-Step: Assigning a Work Order
Step 1.
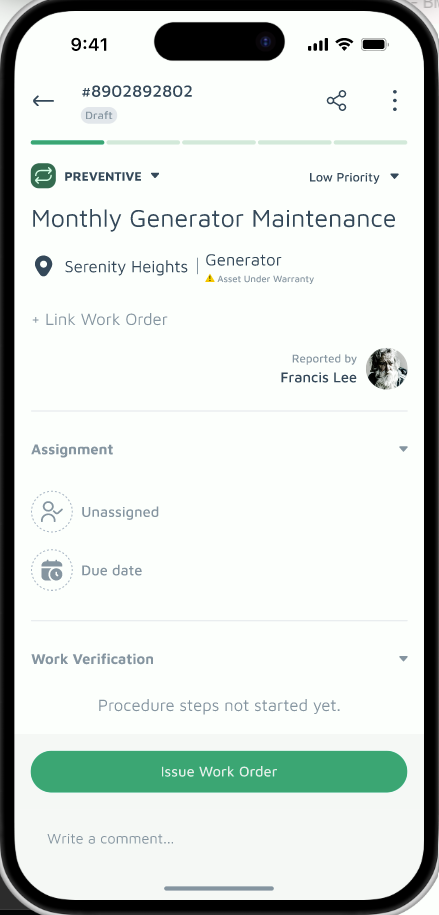
Go to the Home tab, select your active view, and tap on the specific unassigned work order.
Step 2.
Scroll to the Assigned To field within the work order details. If the job hasn't been routed yet, it will display as Unassigned.
Step 3.
-
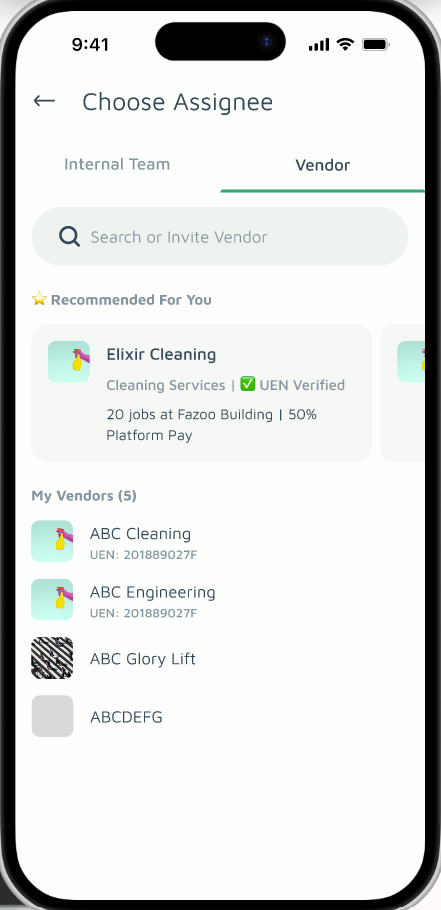
For In-House Staff: Tap the field and select an individual team member from your internal registry. This is perfect for quick, routine fixes handled by your on-site property team.
-
For External Contractors: Select a pre-registered Vendor Organization from the list.
Missing a Vendor? If the contractor isn't listed yet, Building Managers (BMs) can send an invite link to get them signed up.
Simply selecting a name or vendor does not dispatch the task. The work order remains as a Draft until you explicitly tap Issue.
While in draft mode, internal techs cannot clock in, and external vendor managers cannot assign the task to their technicians. You must hit Issue to officially release the job and trigger the live alerts.
Pro-Tips for Clean Coordination
-
Draft Staging: Use draft mode to map out your upcoming weekly or monthly maintenance schedules, assign the target teams, and refine budgets. Once the council or committee gives the green light, you can bulk-issue them to your teams.
-
Onboard on the Go: Don't let an unlisted contractor stall a repair. Use the "Invite Vendor" feature to send an email link. Once they complete their quick profile setup, they can instantly take ownership of the work order.
-
Use Contextual Comments: Need to add gate codes, specific resident requests, or hazard warnings? Drop them directly into the work order Comments thread. The assignee sees them instantly on their mobile app.
