Unlike scheduled monthly preventive maintenance, ad-hoc maintenance begins with an unexpected fault, customer inquiry, or urgent service call. This guide details how contractor teams handle ad-hoc jobs in Basementgrid—from capturing fault details via in-app messages or phone calls to converting them into dispatches and client reports.
Workflow Overview
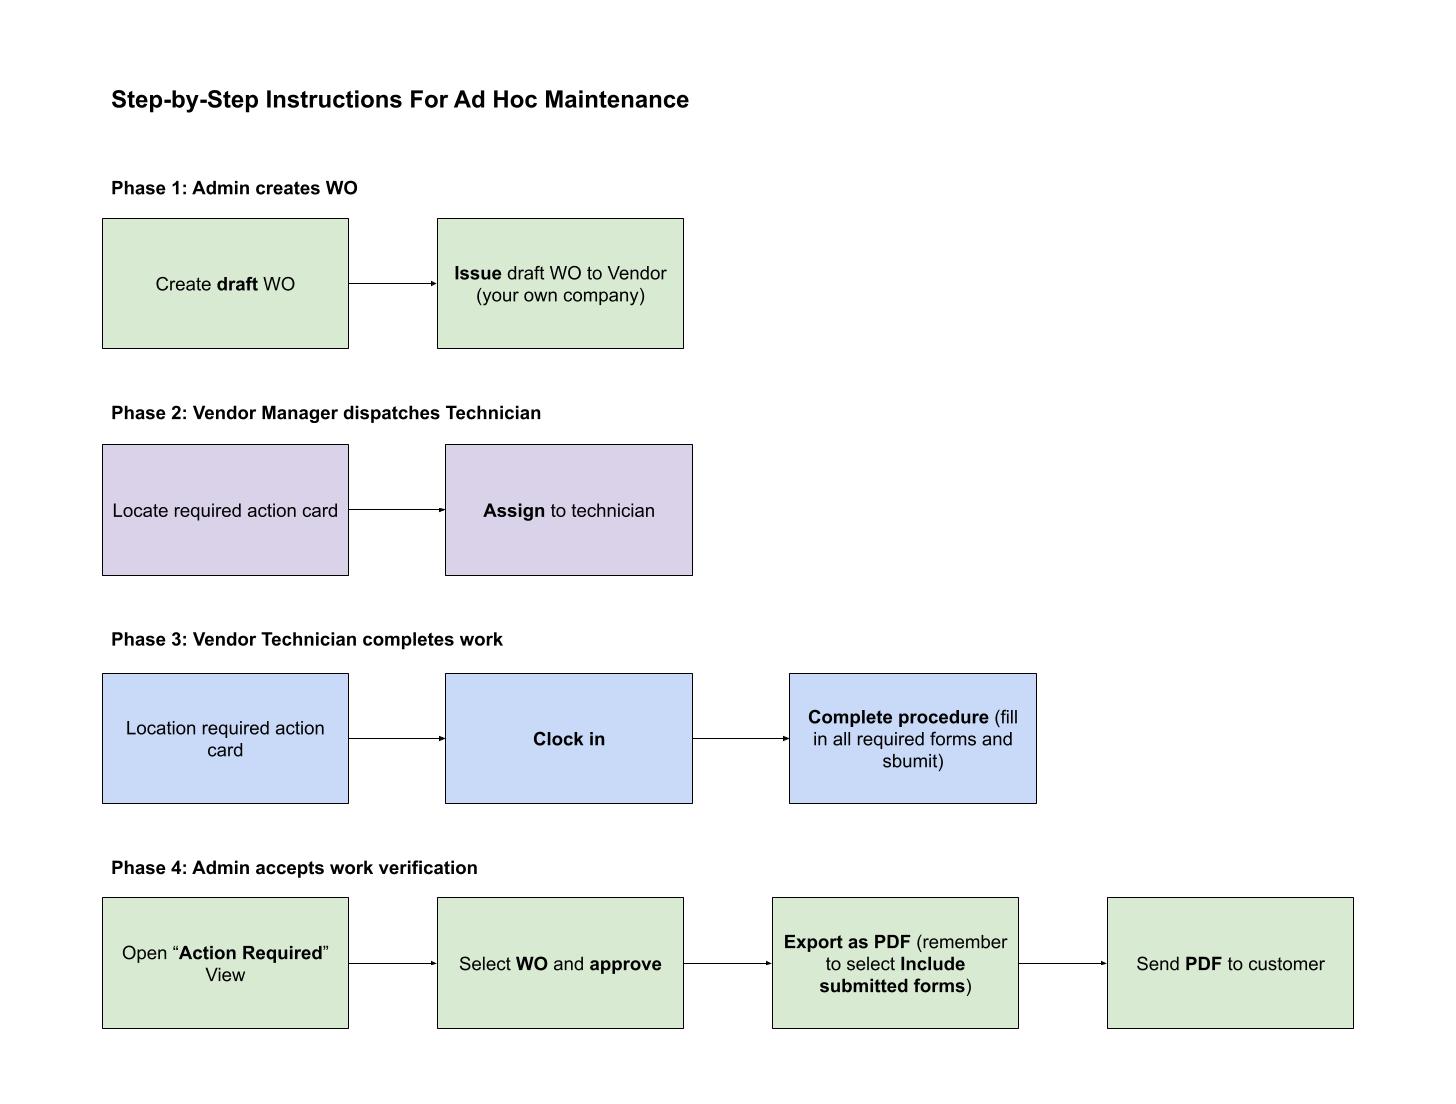.jpg)
1. Capture the Fault Request (In-App or Phone Call)
Ad-hoc requests enter your workflow through one of two channels:
-
Channel A: In-App Messaging (Customer as Requester)
-
Your customer (invited as a Requester) sends an in-app message describing the fault or issue.
-
If your team needs more context, reply directly in the message thread.
-
Attach a Custom Information Form within the chat if you require specific details from the customer (e.g., equipment serial numbers, fault photos, or urgency level).
-
-
Channel B: Phone Call / External Request
-
When a customer calls in a fault, your Workspace Admin gathers the details manually and prepares to log them directly into a new Work Order.
-
2. Convert to Work Order & Issue (Admin)
Once the issue is scoped, convert the details into an active Work Order:
-
Create Work Order:
-
From Chat: Click Convert to Work Order directly from the customer's message thread to auto-populate the details.
-
From Phone Call: Navigate to Work Orders > Create New WO, set the Work Type to Reactive, select the Location, and tag relevant Assets (optional).
-
-
Configure & Attach Forms (Draft Phase):
-
Save the Work Order as a Draft.
-
If you need technicians to follow a specific troubleshooting or repair checklist, click the More icon (...), select Edit Procedure, and attach your custom procedure form.
-
If the customer is a Requester and needs direct portal access to the final report, verify that the Reported By field is set to their contact before issuing.
-
-
Issue to Vendor: Tap Issue Work Order, select your organization as the vendor, and confirm to send it to your team's queue.
3. Assign & Execute (Manager & Technician)
Once dispatches reach your vendor queue:
-
Manager Assignment: The Vendor Manager assigns the ad-hoc job to an available technician.
-
Clock-In: Upon arriving on-site, the technician opens the Basementgrid mobile app and taps Clock In.
-
Execution & Completion: The technician completes the repair, fills out the attached procedure form/checklist, attaches photo evidence of the fix, and taps Complete WO.
GPS Verification Tip: If your customer's location has an address attached, Basementgrid requires GPS-verified photos. Leave the address blank during site setup if location verification is not required for the job.
4. Review, Approve & Deliver (Admin)
After field execution:
-
Review & Approve: The Workspace Admin reviews time logs, notes, and repair photos, then taps Approve.
-
Deliver Deliverables:
-
Option A (Export PDF): Click Export PDF to send a formal repair report to your client via email.
-
Option B (Direct Access via Requester Link): If the customer was assigned as the Reported By contact in Step 2, send them the direct Work Order link, allowing them to directly get the report/submitted form via Export PDF themselves whenever they need it.
-
